
You may think seamless clip in hair extensions for thin hair will show or hurt your hair, but you can make them look real. Many people with thin hair worry about wefts showing, scalp pain, and hair breaking. Picking seamless clip-ins with light, silicone-covered clips helps stop these problems and keeps you comfy. If you use the right products and treat your hair gently, you can make your hair look natural and safe. No one will know you wear clip in hair extensions, and you will feel more confident.
If you have thin hair, you know blending clip in extensions can be tricky. Your hair does not have much volume, so extensions can show through easily. Sometimes, you might see the clips or wefts peeking out, especially if you place them too high or too close to your part. Heavy extensions can also pull on your roots and cause discomfort. You want your hair to look full, but you do not want to damage it.
Here is a quick look at the most common problems and how you can solve them:
Challenge / Issue | Why It Happens | What You Can Do |
|---|---|---|
Extensions are hard to hide | Thin hair has less volume to cover wefts | Place wefts in lower layers and under the crown |
Clips feel uncomfortable | Heavy extensions pull on delicate roots | Choose lightweight, seamless clip-ins |
Not enough volume for blending | Thin hair does not blend well with thick extensions | Use curls or waves and volumizing spray |
Extensions look obvious | Wrong placement or color mismatch | Match color and texture, and place extensions smartly |
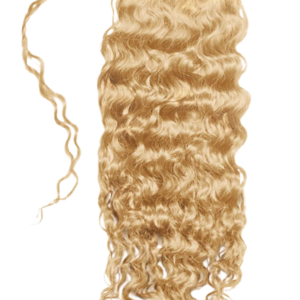
Tip: Try using Slavic hair extensions. They are light and fine, so they blend better with thin hair and do not stress your roots.
You want your hair to look natural and full. Seamless blending helps you get that flawless look. When you blend your extensions well, no one can tell you are wearing them. You feel more confident and ready to take on the day.
Here are some reasons why seamless blending is so important:
You get a natural, undetectable finish that boosts your confidence.
Proper placement and sectioning make your extensions look like your real hair.
Gentle care keeps your thin hair healthy and your extensions looking fresh.
You can style your hair any way you like, from curls to braids, without worry.
Fuller hair helps you feel good about yourself and lets you show off your style.
If you struggle with thin hair, remember that seamless clip in extensions can give you instant volume and length. With the right tips and a little practice, you can enjoy beautiful, natural-looking hair every day.
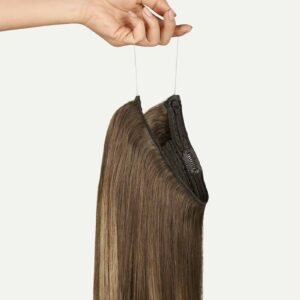
When you have thin hair, picking the right wefts makes a huge difference. You want seamless clip in hair extensions for thin hair that feel light and look natural. Experts say ultra-lightweight clip-in extensions work best for fine hair. These won’t pull on your roots or cause damage. Look for lay-flat, clear-bonded clips and flat silk wefts. These lay close to your scalp, so they blend in and stay hidden. PU-based seamless clip-in wefts are thinner and lighter than classic lace wefts. They help your natural hair cover the extensions, even near your part. You get a comfy fit and a flawless finish.
Tip: Foxy Locks and I Love Slavic Hair both recommend clip-in extensions for thin hair because you can remove them easily and they don’t hurt your fine strands.
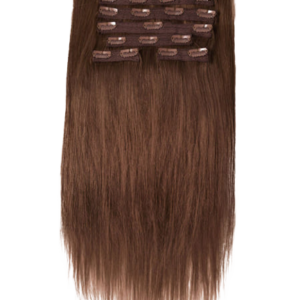
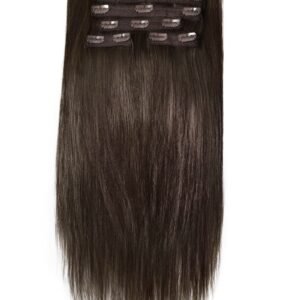
You want your seamless clip in hair extensions for thin hair to match your real hair. Start by looking at your hair type and texture. Is your hair straight, wavy, or curly? Is it silky smooth or a bit coarse? Choose clip-in extensions that copy your natural pattern. For fine, straight hair, lightweight extensions blend best. If you have soft curls, Slavic hair extensions can give you a perfect match. Always test and select correct hair type before buying. This helps your extensions blend in and look real. Use 7-9 wefts for a natural look, and place them below your eyebrow line for the best results.
Color matching is key for seamless clip in hair extensions for thin hair. Start by matching the ends of your hair, not the roots. Multi-tonal extensions with highlights and lowlights look more natural. If you can’t decide between two shades, pick the lighter one. You can always darken it later. Use color swatches in natural light to find the best match. Sometimes, you may need to custom color your extensions for a perfect blend. Layering and styling also help your clip in hair extensions blend with your fine hair. When you follow these steps, your extensions will look like your own hair.
You want your hair to look fresh and full before you clip in extensions. Start with clean hair. Use a volumizing shampoo made for thin hair. This type of shampoo lifts your roots and removes any buildup. After washing, use a mild conditioner only on your ends. This keeps your hair light and bouncy. Dry your hair with a blow dryer for extra volume. Flip your head upside down while drying to get more lift at the roots. Detangle your hair with a wide-tooth comb or a mixed bristle brush. Work from the ends up to the roots. This helps prevent breakage and keeps your hair smooth.
Tip: Always let your hair cool after blow-drying. This helps set the volume and makes your style last longer.
Extensions need something to hold onto, especially if you have thin hair. You can add texture to your roots for better grip. Spray a texturizing spray at the spots where you plan to attach the clips. If you want even more hold, sprinkle a little dry shampoo on your roots. Tease or backcomb the hair near your scalp. Hold the ends of your hair with one hand. Use a comb to push the hair toward your scalp three times. This creates a cushion for the clips. Secure the rest of your hair away with a clip so you can work section by section.
Here’s a quick table with tricks for adding grip:
Trick | How It Helps |
|---|---|
Texturizing spray | Adds hold and texture |
Dry shampoo | Boosts volume and grip |
Backcombing | Creates a cushion for clips |
You want your hair to look full and blend well with your extensions. Volumizing products make a big difference. Use a volumizing serum or shine serum to boost your hair’s body and give it a healthy look. Lightweight pomades or hair essences help control frizz and add a soft hold. These products keep your hair smooth without making it greasy. Apply texturizing spray to wet hair before blow-drying for extra lift. If you need more volume, tease your roots or use dry shampoo. These steps help your extensions stay in place and look natural.
Note: Try different products to see what works best for your hair type. You might find a new favorite that makes your style last all day.

Getting the right placement for your clip-in extensions makes all the difference when you have thin hair. You want your hair to look full, but you also want to keep everything hidden. Start by working from the bottom of your head and move upward. Use clips to hold the top layers out of the way. This gives you a clear area to work with.
When you use 3- and 4-clip wefts, place them at the back of your head. These wefts add the most volume. Secure the middle clip first. This helps balance the weft and keeps it from slipping. For a 4-clip weft, attach the two middle clips before the side clips. Gently stretch the weft sideways as you clip it in. This keeps the hair smooth and avoids bumps. Use smaller wefts on the sides for even blending. Place the side clips just behind your ears for a natural look.
Tip: Backcomb or tease the roots before you add each weft. This gives the clips something to grip and helps your extensions stay put all day.
Always start placing your clip-in extensions just above the nape of your neck. Work your way up, adding wefts in layers. Leave-out enough of your natural hair at the crown and around your part. This top layer will cover the wefts and hide any tracks. If you have very thin hair, leave-out a thicker section at the crown. This gives you better coverage and keeps your extensions invisible.
You want to make sure your leave-out blends well with the extensions. Use a curling iron or flat iron to style both your natural hair and the extensions together. This helps everything mix and look like one head of hair. If you need extra grip, tease the roots of your leave-out before you style.
Here’s a quick checklist for a flawless finish:
Start with the lowest section above your nape.
Add each weft in a new layer, moving upward.
Leave-out enough hair at the crown and part for coverage.
Style your leave-out and extensions together for a seamless blend.
Proper spacing and parting help you avoid visible tracks. When you section your hair, use small, even parts. Each part should be thick enough to cover the weft below. If you make the sections too thin, the clips might show through. If you make them too thick, the extensions won’t blend as well.
Try to space the wefts about an inch apart. This gives your hair a natural look and keeps the extensions from feeling heavy. For the sides, use smaller wefts and place them lower down. This helps frame your face and keeps the look soft.
If you want to hide your part even more, you can braid your natural hair in a semi-circle pattern. This creates a deep side part and gives you a solid base for your extensions. Some people use a wig cap for extra hold, but most find that careful sectioning and a good leave-out at the crown work best for thin hair.
Note: Always check your hair in natural light after you finish. Run your fingers over your scalp to make sure no clips or wefts are showing. If you feel any bumps, adjust the placement or add more leave-out for better coverage.
You want your clip-in extensions to stay put all day, especially if you have thin hair. Teasing, also called backcombing, gives your roots extra volume and texture. This rough surface helps the clips grip better and keeps them from sliding out. You can use a fine-toothed or rat-tail comb for teasing. Start by sectioning your hair where you plan to attach the wefts. Hold a small piece of hair straight up, then gently comb down toward your scalp three or four times. You’ll see the hair puff up and create a cushion.
Here’s why teasing works so well for thin hair:
It adds lift at the roots, making your hair look fuller.
The extra texture gives clips something to hold onto.
Teasing helps blend your natural hair with the extensions for a seamless look.
Professionals use this trick to keep extensions secure and hairstyles lasting longer.
If you want even more hold, you can try root crimping. Use a mini crimper on the roots where you’ll place the clips. The crimped texture acts like Velcro for your extensions. You don’t need to crimp the whole strand—just the base near your scalp.
Tip: Tease or crimp only the sections where you’ll attach clips. This keeps the rest of your hair smooth and natural-looking.
Dry shampoo and hairspray are your best friends when you want extra grip. Freshly washed hair can be slippery, so adding a little grit helps the clips stay put. Choose alcohol-free and sulfate-free dry shampoos to avoid drying out your hair. Spray a small amount at your roots, then massage it in. This creates texture and absorbs oil, making your hair less slick.
You can also use a texture spray or a light hairspray. Spritz the teased section before clipping in the extension. This locks in the volume and gives the clips a sturdy base. If you want even more security, press the clips tightly against the teased roots. Some people crisscross bobby pins below the clip area for extra support.
Here’s a quick checklist for using products:
Product | What It Does | How to Use |
|---|---|---|
Dry Shampoo | Adds grip and absorbs oil | Spray at roots, massage in |
Texture Spray | Boosts hold and volume | Spritz teased sections |
Hairspray | Locks in teased texture | Light mist before clipping |
Note: Always start with clean, dry hair. Oily or wet hair makes clips slip and won’t hold extensions as well.
You want your clip in hair extensions to look just like your own hair. Curling and styling help you get a flawless blend, especially if you have thin hair. Start by curling both your natural hair and the extensions before you clip them in. This step makes the textures match and helps everything mix together. You can use a curling iron, wand, or even heatless methods like braiding or flexi rods. If you have straight hair, adding soft waves gives your style more movement and hides any lines between your natural hair and the extensions.
Here’s a simple way to curl for a natural blend:
Curl your natural hair in small sections.
Curl the extensions in the same direction and size.
Clip the extensions in, then gently brush through both to blend.
Use a light hold hairspray to keep the style in place and tame flyaways.
If you have curly hair, finger twist your natural hair with a little edge control or create twist braids. This helps your curls match the extension curls for perfect blending. Always check your style in different mirrors to make sure no clips or tracks show. When you style your extensions and natural hair together, you get a seamless blend that looks real and feels comfortable.
Tip: Curling the extensions before clipping them in makes it easier to seamlessly blend clip ins with thin hair. You avoid harsh lines and get a soft, full look.
Layering and placing clip ins is a game changer for thin hair. You want your extensions to move and fall just like your natural hair. If the ends look blunt or bulky, you lose that natural blend. Trim hair for better blending by using vertical snips to create soft, feathered layers. This technique removes harsh lines and helps the extensions mimic your haircut.
Many stylists recommend trimming extensions after you clip them in. This way, you see exactly how they mix with your natural hair. Layering lets the extensions flow with your own hair, adding movement and dimension. You can stack wefts at different heights or clip them diagonally to match your layers. These blending techniques make sure there’s no visible line where your natural hair ends and the extensions begin.
Here’s a quick table to show how layering and trimming help:
Technique | What It Does |
|---|---|
Layering | Adds movement, avoids bulky look |
Vertical trimming | Softens ends, removes harsh lines |
Stacking wefts | Boosts volume, keeps blend natural |
Diagonal placement | Matches layered haircuts |
Note: If you’re not sure how to trim or layer, ask a professional stylist. They can help you get a seamless blend and avoid mistakes.
Blending techniques make all the difference when you want a flawless blend. Start by teasing the roots of your natural hair. This gives the clips a secure base and helps hide them. For thin hair, braid or twist the lower layers and pin them flat. This trick hides shorter pieces under the extensions and keeps the look smooth.
Section your hair from the nape to the crown. Clip the extensions in ‘safe zones’ below your eyebrows so the tracks stay hidden. You can stack some wefts or place them diagonally to match your haircut. After you clip in the extensions, use heat tools like curling wands or flat irons on both your natural hair and the extensions. This step blends the textures and finishes for a seamless blend.
Finish your style with a light hairspray or serum. This locks in the look and keeps everything polished. Always check your hair from different angles using mirrors. If you see any tracks or lines, adjust the placement or add more leave-out. For long hair, clip wefts mid-length or lower and tease the roots to hide clips. For short hair, use enough wefts to balance the length and conceal blunt ends.
Tip: If you want perfect blending, style your extensions and natural hair together. Use blending techniques like layering, trimming, and curling for a natural blend that lasts all day.
You want your hair to look smooth and full. The best way to conceal tracks is to use your top layers of natural hair. Start by leaving enough hair at the crown and around your part. This top layer will cover the tracks and help hide hair extensions. You can tease the roots gently to add volume. This makes your natural hair fluffier and helps it blend over the wefts. Try using a zigzag or diagonal part. This trick breaks up straight lines and makes it harder to spot tracks. If you have thin hair, keep your leave-out small. Too much leave-out can make blending leave-out hair harder.
Some people use a crochet hook to help conceal tracks. This method works well if you want a neat finish. You can weave small sections of your natural hair over the tracks. The crochet hook pulls your hair through the wefts, covering them up. This technique keeps the tracks flat and hidden. You get a smooth look, and your natural hair blends right in. Make sure you match the weave type and texture to your natural hair. Lightweight weaves put less tension on your scalp and help tracks stay hidden.
Accessories can help you conceal tracks in a fun way. Try headbands, scarves, or cute clips. These items cover the crown or sides where tracks might show. You can also use hair fibers or scalp concealers to fill in gaps. This creates the look of thicker natural hair and hides any spots where tracks peek through. If you want extra coverage, use a top closure. This covers the crown and means you do not need to worry about leave-out. Always keep your natural hair and extensions clean and moisturized. Healthy hair makes it easier to conceal tracks and keep your style looking fresh.
Tip: Try different styles and accessories until you find what works best for you. You can always change things up to match your mood or outfit!
Taking care of your clip in hair extensions keeps them looking natural and helps them last longer. Good habits make a big difference, especially if you have thin hair. Here’s how you can keep your extensions soft, shiny, and tangle-free.
You want your extensions to stay smooth and healthy. Always brush your clip-in extensions before and after wearing them. Start by gently using your fingers to loosen any big knots. Then, grab a wide-tooth comb or a special extension brush. Work from the ends up to the roots. This way, you avoid pulling and breaking the hair.
Detangle extensions separately from your own hair.
Divide them into small sections for easier brushing.
Brush 2-3 times a day to prevent matting.
Use a leave-in conditioner to keep hair soft.
Before bed, loosely braid your extensions to stop tangles.
Tip: Never brush wet extensions. Wait until they are dry to avoid breakage.
You don’t need to wash your clip in hair extensions every day. Wash them every 4-5 wears or when you notice product buildup. Use sulfate-free shampoo and a moisturizing conditioner. Wet the extensions with lukewarm water, then gently smooth the shampoo and conditioner from top to bottom. Don’t scrub or twist.
Rinse well and squeeze out extra water.
Pat dry with a soft towel—don’t rub.
Lay the extensions flat on a towel to air dry.
Store them in a special bag or box to keep them safe from dust and tangles.
Keep them in a dry place, away from bathrooms or humid spots.
You want your extensions to look and feel their best. Use nourishing oils like argan or coconut oil on the ends to add shine. Try a deep conditioning mask once a week for extra moisture. Avoid heavy styling products and heat tools as much as possible. If you use heat, always spray on a heat protectant first.
Here’s a quick table to help you remember:
What to Do | Why It Helps |
|---|---|
Use gentle, sulfate-free products | Keeps hair soft and healthy |
Deep condition weekly | Restores moisture and shine |
Avoid heavy products | Prevents buildup and dryness |
Store properly | Stops tangling and damage |
Regular care and gentle handling help your clip in hair extensions last longer and blend perfectly with your thin hair.
You can blend seamless clip-in extensions with thin hair and get a natural look. Here’s what works best:
Pick lightweight, matching extensions.
Prep your hair and add texture.
Place wefts low and leave out top layers.
Style and trim for a smooth finish.
Tip: Try new methods and ask a stylist if you need help. Practice makes perfect! You’ve got this—show off your fuller hair with confidence. 😊