You are not alone if you notice your hair getting thinner. By age 50, about half of men and a quarter of women see pattern hair loss. Many factors can cause this, such as hormones, genetics, certain hairstyles, and health issues. Ladyidiy’s Thinning Hair Fill-Ins give you a modern way to restore volume and confidence. You can achieve a natural look at home with the right fill-ins and simple steps.
There are many thinning hair fill-ins you can buy. Each one helps in its own way. The table below lists some popular choices and their benefits:
Product Name | Price | Benefits |
|---|---|---|
Divi Root Touch Up Powder | $18 | Simple to use, small, sweat-proof, hides greys, five colours |
Toppik Hair Building Fibers | $25 | Made with coloured keratin, makes hair look fuller |
Madison Reed The Great Cover Up | $34 | Does many jobs, comes with brushes for hair and brows |
BOLDIFY Hairline Powder | $18 | Covers thin spots, boosts confidence, good after chemotherapy |
COLOR WOW Root Coverup Powder | $35 | Lasts long, looks natural, safe for swimming |
TRUHAIR Color Fibers | $35 | Hides thin areas, helps hair look thicker with use |
Westmore Beauty Hair Coverage | $29 | No talc, sweat and water-proof, soaks up extra oil |
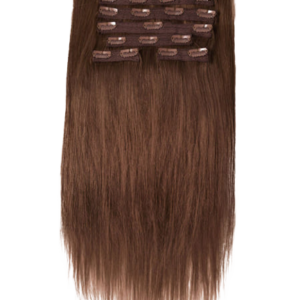
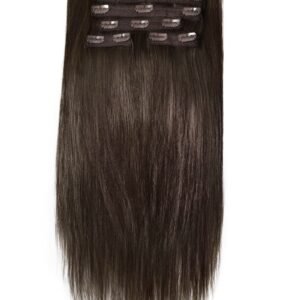
Ladyidiy’s Thinning Hair Fill-Ins are special because they are light and comfy all day. You can wear them without worry. A certified trichologist checks them for safety and quality. You get quick coverage and a natural look.
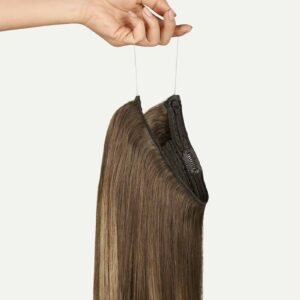
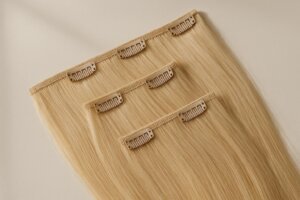
Fill-ins cover thin spots and add volume. Ladyidiy’s Thinning Hair Fill-Ins use small clips that sit close to your scalp. You can put them at the crown, temples, or anywhere you want more hair. You do not need to go to a salon or spend lots of time.
This table shows how Ladyidiy’s Thinning Hair Fill-Ins compare to regular extensions:
Feature | Ladyidiy’s Thinning Hair Fill-Ins | Traditional Hair Extensions |
|---|---|---|
Application Time | 5 to 15 minutes | Longer, often needs a salon visit |
Design | Seamless, fits close to scalp | May be seen |
Material | 100% Remy human hair | May use fake hair |
Comfort | Waterproof tape, non-slip clips | Changes |
User-Friendliness | Easy to use at home | Often needs expert help |
You get a smooth design that looks and feels real. Waterproof tape and non-slip clips keep them safe, even on busy days. You can put them on at home, which saves time and money. Many people pick fill-ins instead of other options because hair restoration can cost thousands of pounds and needs experts. Fill-ins give you a fast, cheap way to feel good and look stylish.
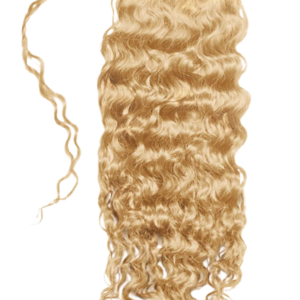
You need to know your hair type before you choose thinning hair fill-ins. This helps you find the best product for your needs. Hair type affects how fill-ins look and feel. Use the table below to check the main factors:
Factor | Description |
|---|---|
Hair Pattern | This shows if your hair is straight, wavy, curly, or coily. It helps you pick the right texture. |
Hair Density | This means how many hairs you have in one area. Low density needs lighter fill-ins. |
Hair Texture | This is about how thick each strand is. Fine hair needs gentle products. Thick hair can hold more. |
Main Hair Goal | Think about what you want most. Do you want to repair damaged hair follicles, add moisture, or boost growth? |
Understanding your hair type helps you avoid more breakage and hair follicle damage. If you have fine hair, you should use lightweight fill-ins. If your hair is thick, you can use fuller pieces. Always choose products that support healthy hair and do not cause more loss.
You want your thinning hair fill-ins to blend with your natural hair. This gives you a seamless look. Here are some tips to help you match colour and texture:
Use a colour swatch to find the closest match to your hair.
Ask a friend to check the match in natural light.
If you are alone, compare your hair and the swatch in a bright room.
For multi-tonal hair, mix shades to get a natural result.
Ladyidiy’s fill-ins come in many shades and textures. You can find a match for straight, wavy, or curly hair. The discreet clips let you place the fill-ins where you need them most, like the crown or temples. This helps you cover thinning hair and avoid showing damaged hair follicles.
You can choose from different volume and coverage options. This depends on how much thinning hair you want to cover. The table below shows some common choices:
Product Type | Description |
|---|---|
Volumising Treatments | Make hair look thicker without weighing it down. Good for early thinning. |
Root Lifting Systems | Give support and lift to fine, thinning hair. |
Hair Building Fibres | Stick to your hair and cover thin spots. Quick fix for small areas. |
Add length and volume. Safe for thinning hair when used with gentle clips. | |
Scalp Micropigmentation | Makes the scalp look fuller by copying hair follicles. Good for advanced thinning or alopecia. |
Ladyidiy’s Thinning Hair Fill-Ins use silicone-covered clips. These clips protect your hair and keep the fill-ins secure. You can place them where you need more growth, such as the temples or crown. This custom placement helps you target areas with hair loss or damaged hair follicles.
Tip: If you are new to thinning hair fill-ins, start with a small piece. You can add more for extra coverage as you get used to the process.
Choosing the right fill-ins helps you support healthy hair and reduce the risk of hair follicle damage. You can boost your confidence and enjoy fuller hair at home.
You need the right tools to apply the thinning hair fill-ins for best results. Gather these items before you start:
Loop Hair Extensions Brush for gentle detangling
Alligator clips to section your hair
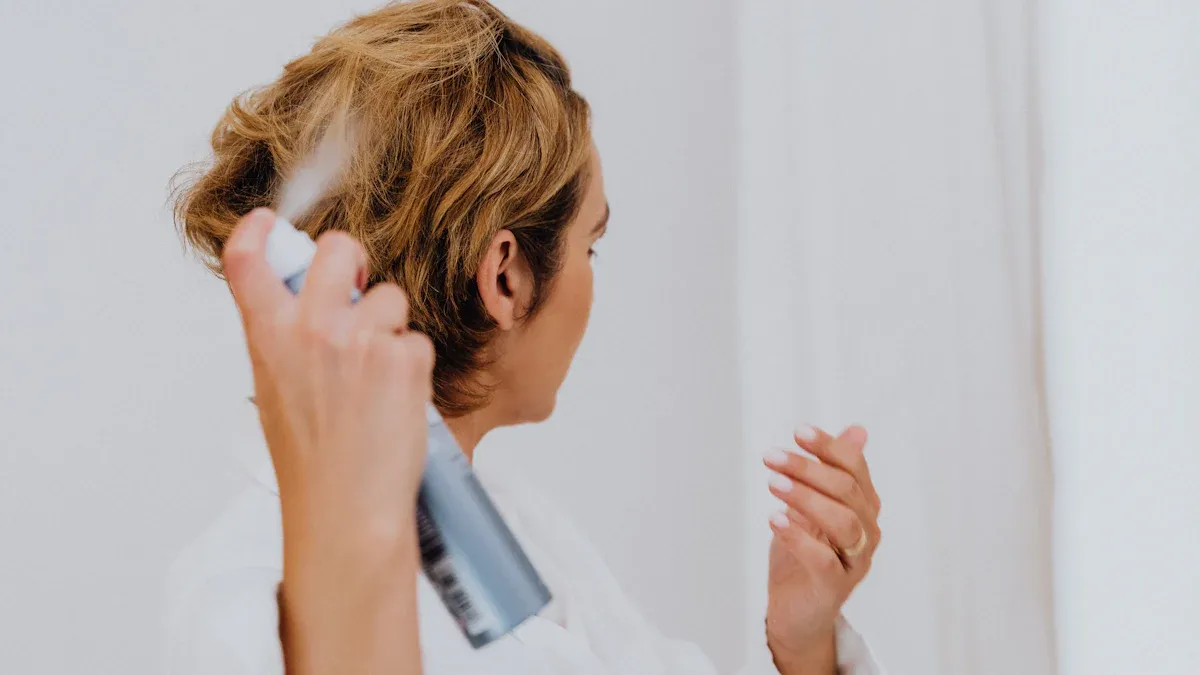
Kenra Volume Spray 25 for finishing and hold
Bumble and Bumble Thickening Great Body Blow Dry Creme for instant thickness and volume
Sea Salt Spray to boost volume and enhance waves
BOLDIFY Hair Thickening Spray for lightweight fullness
INFINITIPRO BY CONAIR Spin Air Rotating Styler for drying and styling
Moroccan oil dry shampoo to absorb oil and add thickness
You protect your hair from breakage and hair follicle damage by using gentle brushes and sprays. These tools help you maintain healthy hair and support growth.
Tip: Always start with clean, dry hair. Dry shampoo can revive hair between washes and prepare your scalp for fill-ins.
Proper sectioning ensures you cover thinning areas and avoid showing damaged hair follicles. Follow these steps:
Brush your hair thoroughly to remove tangles. Use the Loop Hair Extensions Brush for Ladyidiy’s fill-ins.
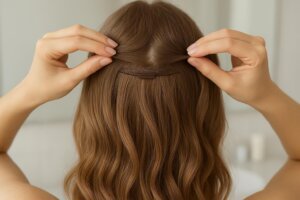
Separate a section of hair on each side of your head at eyebrow level. Clip the hair out of the way with alligator clips.
Secure a 2-clip weft at each temple, about one inch from the front hairline. Place the wefts diagonally for a natural look.
Let your hair down and check for visible thinning or areas needing extra volume. Use four 1-clip wefts wherever you want to add fullness.
Make sure your real hair covers all six wefts. Brush through to blend everything.
Strategic placement helps you target areas affected by hair loss, alopecia, or damaged hair follicles. You can customise coverage for growth at the crown, temples, or other spots.
Note: Start with fewer wefts if you are new to fill-ins. Add more as you gain confidence and see growth.
Blending is key to achieving a seamless finish. You want your fill-ins to look like your own hair. Try these techniques:
Style your fill-ins with curls or waves. This creates a natural look and hides lines between your hair and the fill-ins.
Curl your fill-ins together with your natural hair. This blurs the boundary and boosts volume.
Clip in the wefts higher up for better blending.
Tease your hair at the roots and use sprays to prevent slippage. This creates a solid base for the fill-ins.
Stack wefts to add volume while keeping a natural appearance.
You avoid hair breakage and hair follicle damage by teasing gently and using lightweight sprays. Ladyidiy’s discreet clips help you blend fill-ins without causing breakage or loss.
Callout: For deeply reparative hair care, use treatments that support healthy hair and repair damaged hair follicles. This helps your fill-ins blend better and promotes growth.
You can maximise fullness and longevity with the right styling methods. Try these tips:
Use thinner wefts at the nape and thicker pieces towards the crown for a natural look.
Tease the roots before attaching fill-ins to add lift and help blend them.
Offset the placement of each weft for a staggered effect that enhances depth.
Use a large diffuser to lift roots and create the illusion of volume. Diffusing saves time and boosts fullness.
Blow-dry your hair upside down to increase volume and support growth.
Apply sea salt spray or BOLDIFY Hair Thickening Spray for extra lift without weighing hair down.
You protect your fill-ins from hair follicle damage and breakage by avoiding overuse of heat and chemicals. Always dry your hair before bed and tie it in a loose braid or ponytail to prevent loss and maintain growth.
Mistake | Solution |
|---|---|
Aggressive brushing | Hold the extensions by the bonds when brushing to avoid excessive pressure on natural hair. |
Sleeping with wet hair extensions | Ensure hair is completely dry before bed and tie it in a loose braid or ponytail. |
Overuse of heat and chemicals | Avoid using too much heat and chemical treatments to maintain the extensions’ natural finish. |
Exposure to oils and chemicals | Refrain from exposing extensions to unnecessary oils and chemicals that can degrade adhesive. |
Tip: Use treatments that promote growth and repair damaged hair follicles. This supports healthy hair and helps your fill-ins last longer.
You can apply the thinning hair fill-ins at home with confidence. Ladyidiy’s fill-ins offer instant coverage, support growth, and help you manage hair loss, alopecia, and damaged hair follicles. With the right tools and techniques, you achieve fuller hair and maintain deeply reparative hair care.
You can keep your Ladyidiy Thinning Hair Fill-Ins looking nice with easy cleaning steps. First, use a wide-tooth comb to gently untangle the fill-ins. Clean them with an alcohol-free clarifying solution to get rid of build-up. Pick a sulphate-free shampoo and conditioner to protect the hair and keep its natural oils. Wash the fill-ins in lukewarm water. Dip them in gently and do not rub, as rubbing can cause breakage or hair follicle damage. After washing, wrap the fill-ins in a microfiber towel to soak up water. Let them air dry so they keep their shape and help your hair grow.
Storing fill-ins the right way stops tangling and keeps them fresh.
Make sure all hair wefts are dry and cool before you store them. This stops mould and bacteria.
Keep the fill-ins away from sunlight.
Put them in a box, on a hanger, or in a storage bag. This keeps them neat and stops tangles.
Tip: Clean and store your fill-ins often. This helps your scalp stay healthy and stops damaged hair follicles.
You might have some problems when using thinning hair fill-ins. Here are ways to fix them and keep your hair healthy:
Traction alopecia can happen if you wear tight hairstyles. Try looser styles and thicker braids to lower tension.
Heat damage comes from using hot styling tools. Use less heat and let your hair rest from heat styling to stop loss and breakage.
If your hair looks flat, use a volumising shampoo and blow-dry upside down. This gives extra lift and helps hair grow.
Keratin fibre sprays can make hair look thicker and cover spots with hair loss or alopecia.
Eating biotin-rich foods or taking supplements can help your hair grow and fix damaged hair follicles.
If you see thinning at the ends or scalp stress, do not wear clip-in fill-ins every day. Give your hair time to heal and grow naturally.
Type of Attachment | |
|---|---|
Tape attachments | Every 4 to 6 weeks |
Glue attachments | Every 4 to 8 weeks |
Clip-on systems | Remove daily |
Ladyidiy’s gentle design and strong clips give comfort all day. You can protect your hair from damage and help it grow by following these care tips.
You can get thicker hair at home if you follow these steps. Pick the right fill-ins for your needs. Make sure the colour and texture match your hair. Put them in carefully and look after them well. Most people feel happier and more confident after using thinning hair fill-ins.
92.5% of people say they are happy with coverage and colour.
Many people feel more confident and think they look better.
Practising helps you do it better and makes it look natural. If you want something that lasts forever, you can try FUE, PRP, or LLLT. Share your thoughts or questions below if you need more help.