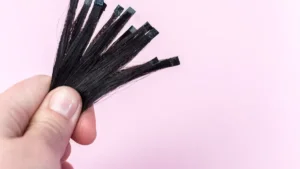
You can create stunning wedding hair dos for long hair at home—even if you have no professional experience. These diy styles save money and let you add your own flair.
Service Type | Average Cost |
|---|---|
Professional | £250+ |
DIY | Free/Cost of new make-up |
All you need are basic tools like a curler, comb, and setting spray. Try adding clips or braids for a personal touch!
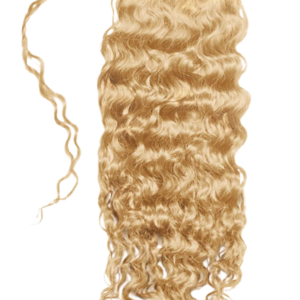
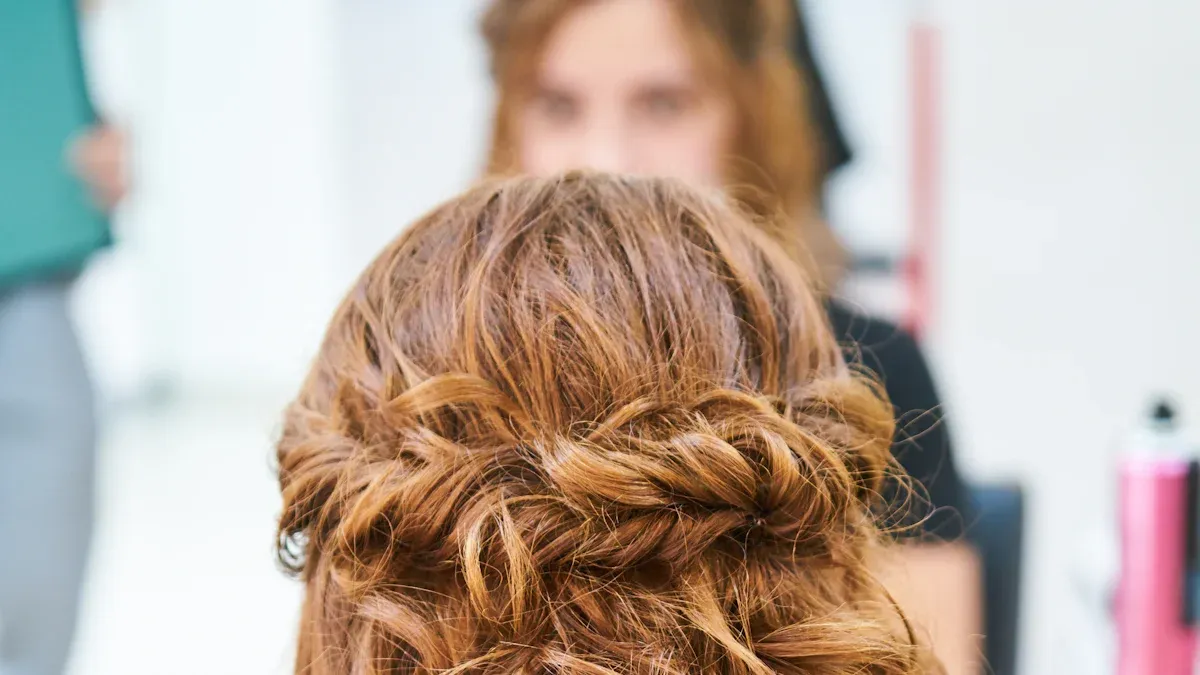
Cascading curls give you a romantic and elegant look. This style works well for anyone with long hair and fits almost any wedding theme. You can wear your curls loose or sweep them to one side. If you want a soft, dreamy vibe, cascading curls are a top choice for easy wedding hairstyles.
Tip: Start with clean, dry hair. This helps your curls hold their shape and shine all day.
Wash and condition your hair with lightweight products. Dry your hair completely.
Spray a heat protectant to shield your hair from damage and keep it shiny.
Divide your hair into sections. Use clips to keep each section separate.
Set your curling iron to the right temperature. Use lower heat for fine hair and higher for thick hair.
Take a small section of hair. Clamp the iron, rotate it, and release. This technique helps you get even curls.
Let each curl cool before touching it. This step locks in the shape.
Once you finish curling, use a light-hold hairspray. This keeps your curls soft and bouncy.
Common challenges you might face include getting even curls and making sure your style lasts. If you struggle, try smaller sections or adjust your heat settings.
You can dress up cascading curls with pretty hair pins, pearl clips, or a delicate headband. Fresh flowers add a natural touch. If you want a classic bridal look, tuck a veil at the crown or use sparkling pins for extra shine. These ideas help you personalize wedding hair dos for long hair and make your style stand out.
You want a style that feels relaxed but still looks polished. The voluminous half-up half-down hairstyle gives you both. This look lets you show off your length while keeping hair away from your face. Many brides love this option because it works with all hair types and lengths. You can wear it with waves, curls, or straight hair. The style feels informal, so you stay comfortable and confident all day. If you want a bridal hairstyle that flatters everyone, this is a top pick.
Tip: Tease the crown gently for extra lift. You get more volume without making your hair look messy.
Brides choose this style for its versatility.
You can keep your hair down but still frame your face.
The look suits many wedding themes, from classic to boho.
Start with clean, dry hair. Brush out any tangles.
Section off the top half of your hair. Use a comb to create a smooth part.
Gently tease the crown for volume. Spray with a light-hold hairspray.
Gather the top section and secure it at the back with a clear elastic or a pretty clip.
Let the bottom half flow freely. Add soft curls or waves if you want extra texture.
Finish with a mist of setting spray to keep everything in place.
You can make this style your own with accessories. Bridal hair combs work well for securing a veil or adding sparkle. Flower hairpins let you add pops of color without a full crown. Jeweled barrettes give you glamour and help hold your style.
Hair Accessory | Description |
|---|---|
Bridal Hair Combs | Versatile and elegant, ideal for securing a veil or adding sparkle to an updo. |
Flower Hairpins | Perfect for adding floral elements without a full crown; can be scattered or clustered for effect. |
Jeweled Barrettes | Glamorous and versatile, great for adding sparkle and securing various hairstyles. |
Try mixing accessories for a look that matches your dress and theme. You can tuck a veil under the half-up section or pin flowers along the twist for a fresh finish.
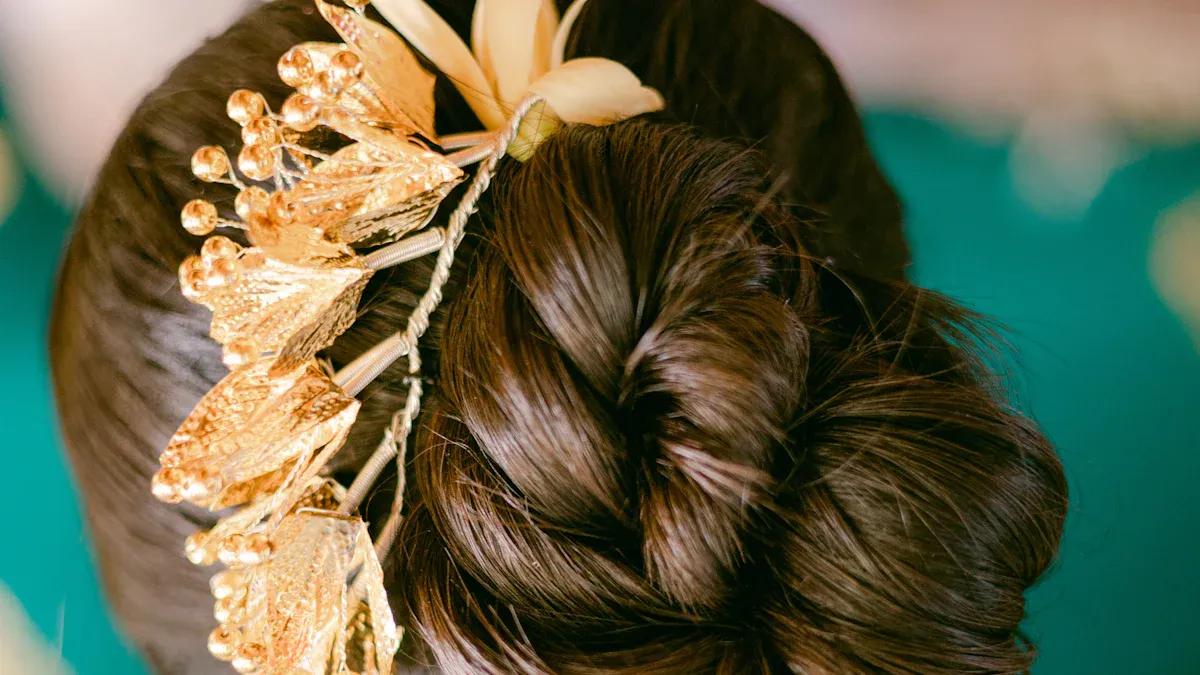
You want a look that feels timeless and graceful. The elegant chignon gives you just that. This bridal hairstyle works for almost any wedding theme. You can wear it sleek for a classic vibe or add twists for a modern touch. The chignon sits at the nape of your neck, showing off your neckline and earrings. Many brides love this style because it stays secure and looks polished all day. If you want one of the most sophisticated wedding hair dos for long hair, the chignon is a top choice.
Tip: Use a little dry shampoo or texturizing spray before styling. This helps your hair hold better and keeps pins in place.
Prep your hair. Make sure it’s dry and not freshly washed. Add texturizing spray at the roots.
Brush your hair back. Decide if you want a tight or loose look.
Gather your hair into a ponytail at the nape or a bit higher. Secure with a hair tie.
Twist the ponytail and coil it around the base to form a bun.
Pin the bun down with bobby pins. Tuck in loose ends for a neat finish.
Spray lightly with hairspray to tame flyaways and hold the style.
Avoid making the ponytail too tight. This can feel uncomfortable and make the chignon stiff. Don’t use too much hairspray, or your hair might look crunchy.
You can choose a classic chignon or try a modern version. Here’s a quick comparison:
Feature | Classic Chignon | Modern Chignon |
|---|---|---|
Style | Timeless and elegant | Incorporates modern elements like braids |
Hair Arrangement | Gathered at the nape into a smooth bun | Can include twists or braids for texture |
Variations | Sleek or relaxed versions | Braided or twisted for a romantic feel |
Accessories | Pairs well with veils and hairpins | Allows for more creative accessory choices |
You can add a veil or pearl pins for a classic look. Try braids or floral clips for a modern twist. The chignon adapts to your style and wedding theme.
A sleek ponytail gives you a modern and polished look for your wedding day. You pull your hair back smoothly, which shows off your face and keeps you comfortable. This style works for almost any wedding theme, from classic to trendy. You can wear it high or low, and it always looks fresh. Many brides love sleek ponytails because they stay neat and last all day, even if you dance or move around a lot.
Here’s a quick look at why this style is a favorite:
Benefit | Description |
|---|---|
Versatility | You can match it to any bridal style or theme. |
Enhances Accessories | The smooth surface lets you show off veils, tiaras, or pins. |
Complements Facial Features | Pulling hair back highlights your cheekbones and jawline. |
Comfort | The ponytail stays secure, so you don’t have to worry about it. |
Minimal Distraction | Hair stays out of your way, so you can enjoy your day. |
Lightweight | You won’t feel weighed down, even after hours. |
Longevity | The style holds up from ceremony to reception. |
Weather Resistance | It resists frizz and keeps its shape, even outdoors. |
You can create a sleek ponytail at home with just a few steps:
Start with clean, dry hair. Brush it until it’s smooth.
Apply a shine serum like Color Wow Pop + Lock for a glossy finish.
Use a fine-tooth comb to pull your hair back tightly. Decide if you want a high or low ponytail.
Secure your ponytail with a strong elastic.
Take a small section of hair from the ponytail and wrap it around the elastic. Pin it underneath for a polished look.
Spray with a light-hold hairspray to keep flyaways down.
Tip: Curl the ends or backcomb the crown if you want extra volume. Wrapped ponytails look especially elegant for weddings.
You can make your sleek ponytail stand out with accessories. Try adding decorative clips, pearl pins, or a sparkling comb. A veil fits perfectly with this style, and you can even use a tiara for a royal touch. If you want something different, mix in a braid or twist for a look that feels like elevated ponytails. Some brides choose a loose updo for a softer vibe, but a sleek ponytail gives you a bold and confident finish.
Product Name | Benefit |
|---|---|
Color Wow Pop + Lock | High shine and smooth control |
Add volume with backcombing.
Use a hair wrap for a sleek finish.
Try decorative clips or pins for extra sparkle.
You want a hairstyle that feels dreamy and effortless. The boho braided crown gives you that vibe. This look wraps braids around your head, creating a soft halo effect. It works especially well for outdoor or rustic weddings. You get a timeless and ethereal style that matches the relaxed atmosphere. Your hair stays neat, but the braids add a romantic touch. If you love natural movement and texture, this crown lets you show it off.
The boho braided crown offers a timeless and ethereal look, perfect for the relaxed atmosphere of outdoor weddings.
It keeps hair neatly in place while providing a soft, romantic feel, ideal for outdoor ceremonies.
Incorporating natural elements like flowers and greenery enhances the bohemian aesthetic, blending harmoniously with the outdoor environment.
Tip: Try this style if you want your hair to stay put during an outdoor celebration.
Brush your hair and part it down the middle.
Take a section from one side and braid it loosely. Secure the end with a small elastic.
Repeat on the other side.
Lift one braid over your head and pin it behind your ear.
Do the same with the other braid, tucking the ends under for a seamless look.
Gently pull on the braids to create volume and a loose updo effect.
Finish with a light mist of hairspray.
You can make your boho braided crown unique with accessories. Here are some favorites for bridal looks:
Floral crowns add a whimsical touch with fresh or silk flowers.
Hair vines are versatile and easy to style.
Gold and silver headpieces bring a bit of glamour.
Hair combs with natural motifs look subtle and pretty.
Feather and tassel accessories give a playful boho vibe.
Crystal and pearl accents add sparkle for a special finish.
Mix and match these pieces to suit your style. You’ll love how they elevate your braided crown and make your wedding look unforgettable.
You want a hairstyle that feels both playful and elegant. The fishtail side braid gives you that balance. This braid works best for long hair, letting you show off natural movement and texture. Many brides love this look because it keeps hair styled but never feels heavy like a full updo. You can wear the braid loose for a relaxed vibe or pull it tighter for a neater finish. The fishtail side braid fits perfectly with bohemian wedding themes, especially when you add flowers. It creates a soft, romantic look that feels effortless and beautiful.
Tip: Let a few face-framing waves fall out of the braid for a softer, more romantic style.
Brush your hair to remove any tangles.
Sweep all your hair over one shoulder.
Split your hair into two equal sections.
Take a small piece from the outside of the left section and cross it over to the right section.
Repeat on the other side: take a small piece from the outside of the right section and cross it over to the left.
Keep repeating these steps, always taking small pieces from the outside and crossing them over.
When you reach the end, secure the braid with a clear elastic.
Gently pull on the braid to loosen it and create a fuller look.
You can tuck in small flowers or sparkly pins for extra charm. This braid looks great with a veil or on its own.
You want your braid to look full and soft. Try curling your hair first to add volume. Use a texturizing spray before you start braiding. This helps the braid hold better and gives it a more relaxed finish. If you want a loose updo effect, gently tug at the sides of the braid after you finish. This trick makes your braid look bigger and more romantic. The fishtail side braid lets you keep your hair manageable while showing off your style.
You want a hairstyle that looks elegant but feels easy to do at home. The twisted low bun checks all the boxes for a wedding day. This style opens up your face, so your features shine in every photo. You get a beautiful detail at the back, which looks amazing with open-back dresses. The twisted low bun works for any hair type and lets you choose how you want the front to look. You can go for soft face-framing waves or keep it sleek. Here are some reasons brides love this style:
It highlights your face and makes your earrings pop.
You get a gorgeous back view, perfect for photos.
You can create it yourself, even if you’re not a pro.
It pairs well with open-back gowns.
You can style the front with curls or keep it smooth.
Ready to try it? Follow these steps:
Brush your hair and part it as you like.
Take two sections from each side and twist them toward the back.
Gather all your hair at the nape of your neck.
Twist the hair into a loose bun and secure it with bobby pins.
Gently pull on the twists for a fuller look.
Spray with a light-hold hairspray to keep everything in place.
Tip: Leave a few strands loose around your face for a softer finish.
You want your veil to stay put all day. Here are two easy ways to secure it with a twisted low bun:
Try the backcombing technique. Tease the section where you’ll place the veil, then use bobby pins to hold it.
Use the hidden ponytail method. Tie a small ponytail under the bun and cover it with the top layer of hair. Attach the veil to this anchor for extra hold.
Both methods keep your veil secure, so you can move and dance without worry.
Soft waves with pins give you a look that feels both relaxed and glamorous. You get gentle movement in your hair, which frames your face and adds a touch of romance. This style works well for almost any wedding theme. You can wear it for a classic Hollywood vibe or make it feel boho with the right accessories. Soft waves let you move easily and stay comfortable all day. You don’t need to worry about your hair falling flat. When you use the right products and styling tricks, your waves hold up against humidity and wind. This style suits many hair types, so you can feel confident your look will last.
Tip: Choose a wave size that matches your dress and mood. Loose waves feel dreamy, while tighter waves look polished.
Wash and dry your hair. Use a lightweight conditioner for extra bounce.
Apply a heat protectant spray. This keeps your hair healthy.
Section your hair with clips. Work with small pieces for even waves.
Use a curling wand or iron. Wrap each section around the barrel, then release.
Let the curls cool. Brush them out gently for soft waves.
Spray with a flexible hold hairspray. This helps your style last.
Add pins or clips where you want sparkle or detail.
You can finish with a shine serum for extra gloss. Try leaving a few face-framing pieces loose for a softer look.
You have so many choices for pins and clips. Here are some favorites:
Sparkly clips make your waves shine and give you a classic Hollywood look.
Fresh flowers add a modern twist and feel natural.
Floral crowns work well for boho weddings.
Hair vines suit nature lovers and add a whimsical touch.
Delicate pins create a minimalist style.
Mix and match these accessories to fit your dress and theme. You can place pins above your ear, along your part, or scattered through your waves. Your hairstyle will look unique and special for your big day.
You want a hairstyle that feels relaxed but still looks special. The messy bun updo gives you that vibe. This style works great for long hair and suits almost any wedding theme. You get a soft, romantic look with loose strands and gentle volume. The messy bun sits at the back or slightly to the side, showing off your earrings and neckline. You can wear it high or low. Many brides love this style because it feels effortless and stays comfortable all day.
Tip: Try pulling out a few face-framing pieces for a softer finish. You get a dreamy look that photographs beautifully.
Ready to create your own messy bun updo? Follow these simple steps:
Brush your hair and add a little texturizing spray.
Gather your hair into a loose ponytail at the spot you like.
Twist the ponytail and wrap it around the base to form a bun.
Pin the bun with bobby pins. Let some strands fall out for a relaxed effect.
Gently tug at the bun and sides to add volume.
Spray with a light-hold hairspray to keep everything in place.
You can adjust the bun until you like the shape. Messy buns look best when they aren’t too perfect.
You can make your messy bun updo unique with the right accessories. Here are some favorites:
Veils (try a minimalist veil for a modern look)
Hairpins
Crystal-embellished halos
Sparkly hairpins
Backwards facing headpieces
Mix and match these pieces to fit your style. A floral headpiece adds a boho touch. Sparkly hairpins bring glamour. A backwards facing headpiece looks stunning from behind. You can tuck a veil under the bun or pin it above for a classic finish. Your messy bun updo will look beautiful and feel personal.
You want a hairstyle that looks magical and feels easy to wear. The waterfall braid gives you a soft, flowing look that works perfectly for long hair. This style lets pieces of your hair fall like a gentle stream, making it one of the prettiest wedding hair trends right now. You can wear it with straight hair or add curls for extra movement. The waterfall braid looks great in photos and stays comfortable all day. If you want a style that feels romantic and unique, this braid is a wonderful choice.
Tip: Try this braid if you want your hair to look fancy but still feel light and natural.
You can create a waterfall braid at home with these simple steps:
Section your hair into four parts. Leave the bottom section loose so the braid can fall into it.
Take three strands from one side of your head. Start braiding and add new pieces of hair as you move toward the center. Secure the braid with a hairgrip when you reach the middle.
Repeat the braiding process on the other side. Join both braids together and finish with a regular plait down the rest of your hair. Use a hair band to secure the end.
Gently pull on the braid to make it look fuller. You can add curls for more texture and volume.
You don’t need special skills—just a little patience and practice. The waterfall braid works best on clean, dry hair.
You can make your waterfall braid stand out with floral accents. Here are some ideas:
Delicate floral elements add a touch of elegance.
Tiny blooms tucked into the braid make your style feel whimsical.
Silk flowers work well if you want something that lasts all day.
Mix and match flowers to match your dress or wedding theme. You’ll love how these accents make your braid look even more special.
You can create easy wedding hairstyles at home with simple wedding hairstyles that fit your style. Try these wedding hair dos for long hair and explore new wedding hair trends. Practice helps you get better. Share your favorite looks or questions below!
When choosing a style, think about your dress, accessories, and if you want loose hair at the front.